Friday, April 6, 2012

Update

Hi everyone,

Wondering where I have been? Well I got really busy teaching Vegetarian Classes on Dishup.com. Its really great, but between that and work (and home life) I have not had that much time for my blog. I promise I will try to update this when I can. However in the mean time, make sure to check out my article http://www.dishuptoday.com/WordPress/2012/03/27/athalia-more-options-for-vegitarian/ and even sign up for a class. I know for a short time they are offering your first class free. Not sure how long this would last, so act soon! 

Tuesday, January 31, 2012

Vegan Black Bean Burgers with Spicy Guacamole and Fried Plantains


                                         There are a couple companies out there that make some really tasty Black Bean Burgers. One that I really like comes from a famous fast food chain, and another from a company specializing in Vegetarian/Vegan products. Both of then have chunks of black beans in them that makes for an interesting burger texture. I decided to make my own black bean burgers, not so much because I did not want a fast food day, but mostly because I am sure that both burgers that I like contain ingredients that are probably not that good for me. One being high amounts of sodium. 
                                         The good thing about re-creating a dish at home that you like, is that you are able to control what goes into it, and how much of a specific ingredient you use. Of course, there is the added bonus that probably for the price of one of the burgers, you can make more product, having leftovers for another day. I love this version so much, that I plan to make some extra, wrap them individually in parchment paper and then foil, and freeze them. That way, when I need one, I or my husband can just grab, cook and eat! Hope you enjoy this recipe as much as I enjoyed making and eating them!
P.S. This is another Semi-Homemade Dish...so it won't take long to make :)

Ingredients
2      cans of Black Beans (does not matter the brand)
4      pieces of Whole Wheat Bread (for bread crumbs, or you can buy them)
1/2   yellow onion
1/2   green pepper
3-4  cloves garlic
2 tsp cumin (I simply adore this spice)
1 tsp paprika
1      pack of guacamole, spicy (or you can make your own as shown here)
cilantro (I just used what is shown in the pic, sorry I did not measure, just wanted the taste of it)
1      pack of whole wheat hamburger buns
Vegetable Oil
Salt to taste
Pepper to taste

Method

1. Gather all ingredients as shown in the picture below. Be sure to rinse the black beans before using them.
2. Using a food processor/Vita Mix, made bread crumbs with the bread (if not you can always use store bought bread crumbs)


3. Add the onion, garlic, sweet pepper and cilantro to the food processor/Vita Mix and chop. If you prefer you can chop them by hand into small bits. You want to leave whatever liquid this process makes with the mix as this helps bind your burger together. This is a good point to add some salt and pepper to the mix.
4. Next using the same mixer, you can mash the beans, or if you prefer you an use a potato masher or a fork. You don't want to completely cream them. (See pic below).
                 

5. In a bowl, combine all the ingredients together. Make sure to add the spices listed above, as well as any other spices you may like (remember good chefs only use recipe's as a guideline, but use their taste buds and heart to help them make masterpieces!) It would be slightly wet to the touch, but that's how you want it. 
6. Using a little vegetable oil on your hands, pick up some of the mixture and form a burger in your hands. Lay it out on a baking sheet covered in foil.I made mine about1 inch thick and a little smaller than the burger bun.  Continue making the burgers until completed. The should look like the picture below.
                      

7.Place them in the refrigerator or freezer for about 10 minutes so that they have some time to set up a bit.
8.Then bake them covered (use foil) at 350 degrees for about 30 minutes.
9. Let them cool and assemble your burger as shown below. Feel free to add whatever you want to your burgers. My husband and I enjoy them with guacamole. However you can put ketchup, mustard, pickles, tomatoes, lettuce etc. Its your burger! :) If you are making the fried plantains with it, now is a good time to make them.


Sunday, January 29, 2012

Semi-Homemade Veggie Bean Tortillas with Guacamole and Fresh Pineapple Lime Juice


                                       Sometimes I get tired of cooking elaborate meals. Especially because I spend my entire day cooking at work, only to have to come home to cook again. When these days occur, and I do not feel like getting a fast food option, I cook semi-homemade meals. They are quick, convenient, still taste yummy and can also be healthy. When I cook semi-homemade, I try to add elements that I have to make from "scratch" to make it seem more "home-like". (In this instance I did guacamole and a fruit juice)
                                      Since my days have been really busy lately, not only have I not had time to blog, but I have not had that much time to devote to cooking either. Hence the blog will have its moments of semi-homemade food. So don't judge, just cause I like to cook, does not mean I like to cook ALL the time :) (i.e my career and home). However, thank God for a hubby who can cook and picks up the slack when I have these moments. 

Ingredients

1    onion (cut in half. Use 1/2 for taco filling, 1/2 for guacamole)
1    green pepper
1    can of kidney beans (washed and drained)
1/2 pack of taco seasoning mix
1    pack of flour tortillas (or you can make your own if you have time)
1    bottle of salsa (your favorite kind)
2    tomatoes
2    avocados
2    limes. (use 1/2 for guacamole and the rest for juice)
1/2 cup cilantro
1/2 fresh pineapple
  2  cloves garlic diced (you can use depending on your like or dislike of garlic)
      oil
salt to taste (I used this only in the guacamole, the taco seasoning has MORE than enough salt)
pepper to taste
sugar to taste

Method:

1. Gather you ingredients like the picture below. To save time I gather all my ingredients and dice or cut them and place them together. In the industry its call mise en place or everything in its place. This makes it easy to just grab things and add to the pot/dish instead of going back to the cutting board each time. 

2. To a saute pan, add a little vegetable oil and heat. Then add the onions, pepper and garlic. Saute until soft, but not browned. Add the red beans and HALF the packet of taco seasoning. Continue to cook until beans are heated through and flavors are meshed together. You can set this aside while you work on the guacamole.

3. This is the fun part cause I have a Vita-Mix (which is a really top notch blender. We use this in the industry as well.) I make my guacamole using this. Of course you don't want to pulse it till its terribly smooth, I like mine kinda chunky. So in the blender/food processor, place avocados, tomatoes, cilantro, salt, lime juice and onion. See pic below for what it looked like before making. Taste and adjust salt before putting in serving bowl. (If you are doing this by hand, you would need to cut ingredients smaller and mash the avocados by hand). 

4. I did not take any pics of this, but making the juice was very simple. I placed some water, the pineapple which I cut into chunks and the remainder of limes which I peeled and cut in half. I blended it and then added sugar. I only had to add 2 tbsp of sugar because the pineapple was already sweet. 

5. The next step is getting ready to assemble your tacos to get ready to EAT!. Firstly I take the tortilla shells and heat them up in a skillet (without any oil). This makes them a little more pliable (and it would stay in the way I want them).

6. Then I assemble them like the pictures shown below. First I place salsa on the heated tortilla, add the filling on top, add some cheese, and then wrap them. I continue this until completing my dish and then sprinkle it with chopped cilantro. 


I hope you enjoy my semi-homemade meal :)


Thursday, January 5, 2012

Chocolate Peanut Punch-Natural and Yummy Energy Drink


                        My husband was working on a friends' car recently and it was a relatively nice day here in Orlando. I figured it would be nice to surprise him with a nice cold glass of something. I decided, since I had so much peanut butter (from couponing) that I would whip up some peanut punch with a twist. 
                        For vegetarians, you get protein and vitamins from having a glass of peanut punch. It contains about 25 % protein, calcium, niacin, folate, fiber and vitamin E just to name a few. It is great for energy instead of caffeine filled energy drinks. To my recipe, you can add a banana and even top it with granola!

Ingredients

3 cups  Cold Vanilla Almond Milk (love the dept of using the Almond flavors)
1/2 cup Favorite Peanut Butter. (I used Honey Roasted)
5 tsp     Cocoa Powder (please the unsweetened cocoa, not cocoa mix for hot chocolates)
4 tbsp   Sugar (I used granulated cane sugar)
1/4 tsp  Vanilla Essence
pinch     Cinnamon
5 oz      Ice (optional)

Method

1. Place all ingredients in the blender and blend until smooth. Taste for sugar and adjust if you think its necessary. (I did not make it a sweet dish, just enough to make the cocoa powder taste good).

2. Optional: You can add ice and continue to blend for an icy treat!


Monday, January 2, 2012

Wholly Guacamole


                             A New Year has begun, and traditionally, (if I were at home in Trinidad), my mother would cook up a pot of Black Eye Peas and rice. So I thought it would be perfect for me to make my own version of the dish......However, 2012 did not start off as I thought it would. I was sick in bed the night before. (I usually cook the dish I am blogging about the day before I write about it). So there was no cooking taking place at my house for the New Year (wait, expect my husband cooked for me last night :).
                            No I'm not superstitious or anything, but usually, cooking rice and black eye peas for January 1st supposedly sets you up to have a prosperous New Year. Since I was not able to have that traditional dish, I got the next best thing....CHIPOTLE!. Even before I began writing this blog, I wanted to talk about Chipotle, and I think for January 1st, it had the most suitable components. Peas (although not black eye) and rice.
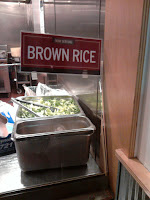
                             Even though I love to cook, sometimes I don't (surprise....well not to my husband)! On the days that I want a day off, Chipotle is my GO TO fast food. I love it cause its vegetarian, healthy, FAST FOOD and a good value for your money. PLUS now they have brown rice as an option!
                            I love to have brown rice, black beans, the grilled peppers, mild and medium salsas, a little cheese, corn and guacamole on the side. How do you like your Chipotle? And what's your favorite vegetarian fast food option?

Friday, December 30, 2011

Vegetarian Coq Au Vin (Rooster in Wine) with Whipped Mashed Potatoes (a very indulgent meal, but you gotta indulge sometimes!)


Please when making this dish or any of my own creations posted here, use your own creativity. The recipes I post are based on what I like. Feel free to tweak them the way you want them. Usually I don't measure ingredients, I just know what is missing, or what needs adjusting. Chef's only use recipes as guidelines, if they use them at all!

                              For our wedding reception we gave our guests a choice between a Coq Au Vin and a vegetarian version of the same dish. Funny enough, and maybe that's just how dinner goes at wedding receptions, my husband and I did not really eat that much. Because we did not get to enjoy our wedding meal, on our first anniversary, I decided to make the vegetarian version, since by then we had become vegetarians ourselves. (Only one of us was vegetarian on our wedding day :). I had never made it before and so, it was just GOOD. (I served it with rice pilaf and steamed vegetables). The second year, I attempted to make it again (note, I only make this recipe ONCE a year!)....and obviously it was better than it had been the year before.(I served it with rice pilaf and sauteed vegetables) This year, I made it, and my husband said, "it was one of the best foods he ever tasted!". (Even though I paid no special attention to the vegetables this year...lol) So I think this is the winning recipe. I am sharing it, not only for your benefit, but for mine, so next year I can return to this page and see what I did..

Ingredients

10 oz       Veggie Chik'n Patties (I used the Italian Version) sliced
10            Pearl Onions (peeled and sliced in half)
8 oz         White Button Mushrooms (sliced)
1 clove     Garlic (minced or grated finely)
1              Bay Leaf
1 1/2cups Vegetable Stock (Homemade or Store bought)
350 ml      Red Wine (or you can use diluted red wine vinegar, red grape juice diluted with red wine vinegar.   I have not personally tried it. Depending on how long you cook the dish with red wine you can end up with less than 5% alcohol. I like to simmer mine for at least 2 hours)
2 tsp        Dried Thyme leaves
2 tsp        Dried Parsley leaves
2 tsp        Oregano leaves
2 tbsp      Butter (if Vegan use the alternative)
olive oil
salt to taste
black pepper to taste

Whipped Potatoes

2lbs           Red bliss potatoes
1 1/2 cup    Butter (melted) (The number one reason why mashed potatoes made by some restaurants will taste better than yours is because they mix in an enormous amount of butter. There is an industry saying, "THE MORE BUTTER THE BETTER. Let me also say that even though I eat healthy, I don't eat mashed potatoes everyday..not even once a month. Also you want to use REAL butter instead of the overly processed crap found on the shelves. Hydrogenated stuff should STAY OUT OF YOUR KITCHEN!...butter is actually healthier than margarine).
1/2 cup      Almond/Soy Milk (This time I did not even use the milk the butter was more than enough)
salt to taste
white pepper to taste

* When I say salt and pepper to taste, it means that you add to adjust. I season my dishes 3 times while cooking..beginning, middle and end with just salt and pepper to really bring out the flavors without it tasting salty or too much pepper.

Method

1. Slice up all ingredients, measure all ingredients

2. Put some olive oil in a heated pot (I used a 5qt covered saute pan). When the oil gets hot (not smoking) add the sliced mushrooms. Saute them until they begin to get brown and yummy.


3. Add the pearl onions at this point with the crushed garlic. Allow the mushrooms to cook some more.
4. Add the Chick'n veggie meat to the pot and stir in. Allowing some of the flavors to get happy with it!
(Note: using the breaded patties removes the task of mixing a roux to thicken the dish near the end. the breadcrumbs thicken it up all on its own!)


 5. When you think it has time to heat up and "play" together for a while, then you can add the red wine. 
 6. After adding the wine, add the vegetable stock. You want to make sure that all the ingredients are covered so add more stock if necessary (this is when keeping store bought stock on hand comes in handy)
7. Add the bay leaf and cover. Allow it to simmer for at least 1 hour. You want the sauce to reduce and thicken before using. (I say this because even though the chick'n is cooked, you still want it to soak up the flavors of the dish. It takes a while for the Chick'n flavors to become subtle.


8. The finished product looks like the picture below. See the difference from the picture above? YUMMY!

9. While your dish is simmering, its a good time to work on your whipped potatoes, if that is your choice of starch to serve with the dish. I start with placing the potatoes in cold water in a pot, with some salt and placing in on the stove top.  (2 Notes: You never want to start with hot water. Boiled potatoes should be started in cold water instead of in hot water. This allows for even cooking. Also you want to add salt to your water, especially if you are using the potatoes with the skin like I did. It helps with the flavoring)

                                           
10. Cook potatoes until they are cooked.( insert a knife into a couple of the potatoes to check. It will be ready when they are soft, but not overcooked)

11. Strain off all the water. Leaving it in the pot it was cooked in (I do this because the pot is still heated. You never want to use cold items on your hot potatoes), use a potato masher to break it up. It should break up easily. 
12. Place the potatoes in a stand up mixer with the paddle attachment. Melt the butter (and if you want to use cream or milk, heat this up as well, separately. 
13. Add your melted butter to your potatoes first until it reaches the texture you desire. Then if you want, you can add the milk. I did not add milk this time as my potatoes reached the consistency and texture with just the butter! Turn your mixer on and whip for a short period. YOU DO NOT WANT TO OVER MIX. They should look like the picture below. Remember to season with salt and pepper IF needed. 


Wednesday, December 28, 2011

Sorrel Drink (Roselle)


                                 I know that a couple people do not know what the picture above it. Its called Sorrel. (You can check out Wikipedia for an in depth knowledge of this lovely flower). However in short, the picture you see above you is used to make what is in essence a tea that is served chilled. Sorrel is an item that many Caribbean people, regardless of where they live, like to consume, especially around Christmas time. While it may be found fresh in many Caribbean countries, its hardly found fresh in the US and is usually found in its fried, packaged form. Benefits: Rich in Vitamin C, Calcium, niacin and riboflavin. Also an antioxidant.
                              To my surprise, in November I found them fresh at a local Caribbean store and got a couple pounds of it. Now, I knew that they were not exactly ready to be picked, but decided it was better than nothing. Took them home, took some pictures and made some Sorrel (which did not actually last really long, and was completely finished before the Christmas season). Making Sorrel brought back the memories of my mother buying them and teaching me how to clean them. I was also reminded how they can stain your fingers red, and can sometimes be itchy! I know there is a remedy for that, but I could not remember at the time. So here is my attempt to walk you through making Sorrel drink for your home (yes even after Christmas)...P.S. I cannot take any credit for this recipe.....its just something that everyone knows how to make I suppose. The basic one is as follows

Ingredients

1 lb sorrel
4 cups water
1 cinnamon stick
6 cloves
sugar to taste as needed
Cherry Brandy for flavoring (optional. Some people only do this for adults, my Mom did this)
(Some Caribbean countries also add Ginger...example Jamaica)

Method

1. Remove the seeds from the sorrel petals. To do so, use a knife and run it in a circle at the top of the sorrel. See picture for clarification.


2. Wash all the sorrel petals before placing them into a pot.
3. I like to add enough water to cover my sorrel ( water depends on if you want it stronger etc). I also add my water and sorrel in the pot at the same time and bring it to a boil with the cinnamon sticks and cloves. (Many people bring the water to a boil first and then add the sorrel. I personally see no difference). I boil it for at least 15 minutes, though I have seen my Mom boil it for longer. 
4. I turn the heat off and leave it in the pot overnight so it can steep better.
5. Next morning, I strain the contents of the pot (don't throw away the petals, they can be used to make a nice alternative to cranberry sauce). 


6. If you are ready to use it then you can add your sugar to it at this time. (diluting with water if necessary. Some people like their sorrel to be very syrupy!). If you wish to store it, store in the refrigerator. 
7. It should be served cold, however when I drank it warm some time ago, it was like a flowery tea.


HOW DO YOU MAKE YOUR SORREL?